Data Validation Using Data Contracts
Concepts
Orbit's data validation functionalities center around the following concepts:
-
Data Contract. A baseline of your reference dataset containing the schema information, expected statistics, and validation tests to run on new, incoming datasets.
-
Monitor. Can be created from any Python file, which will be scheduled to run automatically and periodically. To create a Monitor for data validation purposes, you can include in the Python file code snippets that call the
validate()method of a DataContract object. -
Monitor Job. A single run of the Monitor. Once a Monitor is created and scheduled, at each scheduled time, a Monitor Job will get launched as a containerized workload and execute the Python file contained in the Monitor.
-
Validation Report. The outcome of the
validate()method of the Data Contract object. If thevalidate()method is included in a Monitor, the Monitor will produce a new Validation Report every time a Monitor Job is run.
Now, let's go through end to end to learn how to use Data Contracts to validate data for your machine learning models. We will go through the following:
The code and data that the following walkthrough uses can be downloaded from here.
This example repository comes with an example training dataset and an example production dataset. They are for illustration purposes only. In practice, the data will likely come from a data pipeline which you load in your training and production inference code.
Creating a Data Contract
The first step in using Orbit to validate data in your machine learning pipeline is to create one or more DataContract objects as baselines of your data, which can be applied to validate that future data have not deviated from expectations.
A DataContract is a Python object containing the following information about a dataset (the reference dataset):
-
Schema of the reference dataset
-
Statistics on the reference dataset (e.g. distribution, minimum and maximum values, and special values in each column)
-
Tests that can be applied in the future to validate whether a future dataset (e.g. future data from the same data pipeline) has deviated from reference dataset
Data Contracts can be created using the DataContract class in foundations_orbit. For example, at model training time, you can add the following snippet in your code:
from foundations_orbit import DataContract
import pandas as pd

# Load your reference dataset in a pandas dataframe called reference_df
reference_df = pd.read_csv('reference_dataset.csv')

# To create a Data Contract for reference_df
dc = DataContract("my_contract", reference_df)
That's it. This line of code automatically computes statistics of your reference_df and configures two default tests that can be used to validate future data.
In this example, we loaded data in from a CSV file, but you can also use the appropriate python libraries to load data in from a SQL database or from files in a distributed file system.
Note
Data Contracts in Orbit currently use python's Pandas library to create a baseline and validate future data. This means that the current dataset sizes supported are limited to what you can load into memory on the machine where the Data Contracts are created or validated.
By default, when you create a DataContract object, two tests are automatically enabled and configured:
-
Schema test. Checking for column name, data type, and ordering of all columns in a dataset.
-
Distribution test. Checking for distribution for each column in a dataset. By default, it uses "L-infinity" as a method of quantifying if a column's distribution has drifted. If the value is over
0.2, the column "fails" the test.
Before you save the Data Contract, you can further customize it for your usage using the configure method. For example:
dc.special_value_test.configure(attributes=reference_df.columns, thresholds={np.nan: 0.1})
dc.min_max_test.configure(['age'], lower_bound=0, upper_bound=120)

# Save the Data Contract to the current directory
dc.save(".")
special_value_test for all columns in our reference dataframe to check for the occurence of NaN values, and the min_max_test for the age column to ensure that every value in the column is between 0 and 120.
We then saved all of this information in a Data Contract called my_contract in the current project directory.
More information about DataContract and the different tests supported can be found in the SDK reference.
Validating data using Data Contract
After you have created and saved a Data Contract from your reference dataset, you can apply it to validate data. In our example in the previous section, we created, configured, and saved a Data Contract called my_contract
In a different python script, let's call it validate.py
import foundations
from foundations_orbit import DataContract

# some code to load the latest data from your data pipeline
# assume the data to be validated is in a pandas dataframe called validate_df
...
# load Data Contract object
dc = DataContract.load(".", "my_contract")

# validate validate_df against the Data Contract
report = dc.validate(validate_df)
print(report)
In this example, we validate our dataset validate_df using the my_contract we created in the previous section.
The validate() method applies the tests in the Data Contract on the dataset in question.
For example, in the distribution_test, it will compute the distribution breakdown of validate_df and compare it with the distribution of the reference_df, which is stored in the my_contract object.
If you just run validate.py as a regular Python script, e.g. by running python validate.py, it will print out the report object, which is a json object that summarizes the outcome of the data validation.
However, it'd be cumbersome to manually run python validate.py whenever we want to validate new data in our data pipeline. In addition, the json output is really hard to read.
The next step is to schedule the execution of the validation script validate.py. This can be done in two ways:
-
Create and schedule an Orbit monitor with
validate.pyusing Orbit's built-in scheduler. This will generate validation reports that you can view on the Orbit GUI. Continue this walkthough to see how to accomplish this. -
Use your existing pipeline scheduling tool (e.g. Airflow) to run
validate.pyautomatically, then view the resulting validation reports on the Orbit GUI. Check out our Airflow tutorial here to see how to use Airflow with Orbit.
Next, let's see how we can create a monitor to automatically run validate.py for us.
Creating a Monitor for data validation
Now that we have our Data Contract and validation python script defined, we can create an Orbit monitor by running the following command in the terminal:
foundations monitor create --name monitor1 . validate.py
We'd expect to see the following feedback:
Foundations INFO: Creating monitor ...
Foundations INFO: Job bundle submitted.
Foundations INFO: Monitor scheduled.
Successfully created monitor monitor1 in project orbit-example-project
More information about the command line interface can be found in the CLI reference.
Next, let's head to the Orbit GUI and do the following:
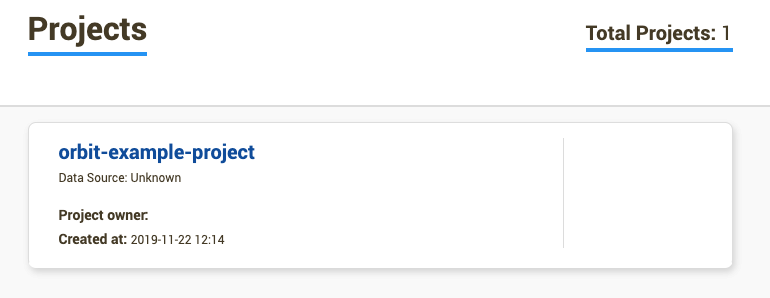
-
On the GUI, click on the
orbit-example-projectproject, which should lead you to the Monitor Schedules tab.
-
In the Monitor Schedules tab, you should see a monitor called
monitor1. Click on the monitor to see details about the monitor.
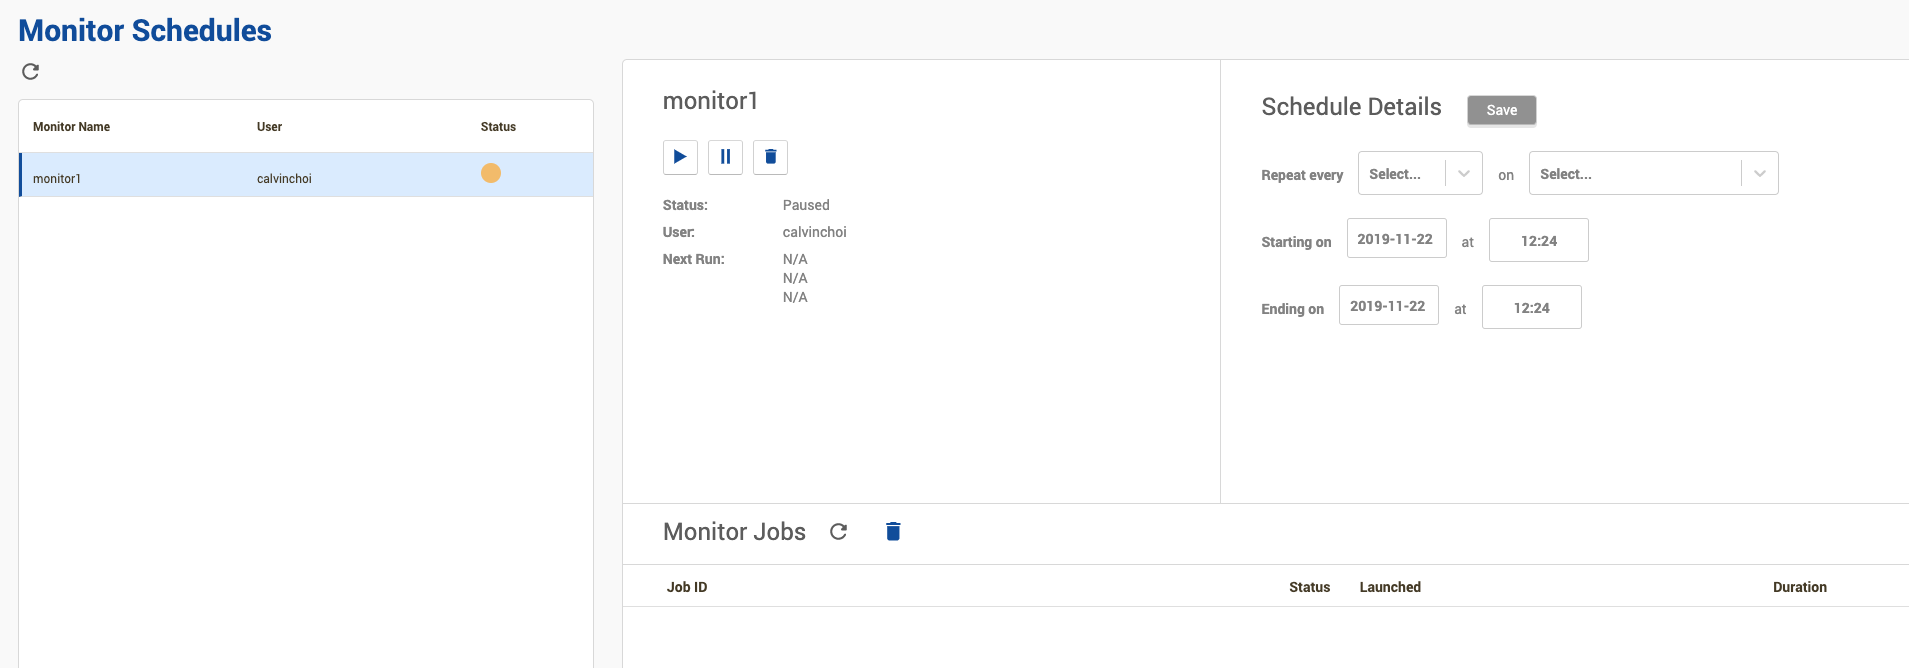
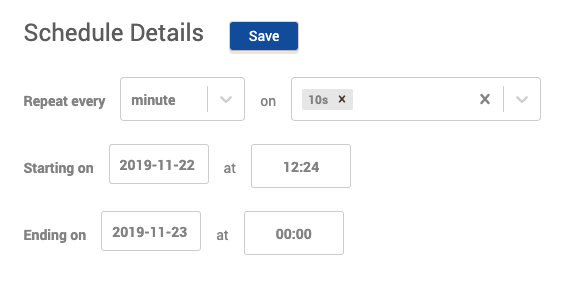
-
Under Schedule Details, set the schedule to run the monitor every minute at the 10th second.
-
Also set the "Ending on" date and time to sometime in the future.
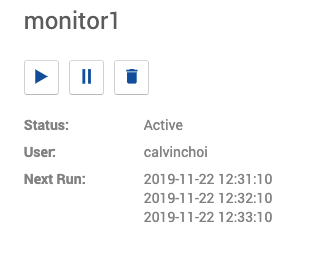
-
Once you click "Save", the Monitor's status will become Active and times in Next Run will get updated.
-
Click on the refresh button (
 ) next to
 Monitor Jobsto see a list of jobs run at the scheduled times.

-
When a job is being executed,
Statuswill show a blinking green circle. -
When a job is completed,
Statuswill show a solid green circle. Click the button on the right hand side of the table row ( ) to view the logs of the job.
 -
You can pause the Monitor at any time by clicking on the pause button (
 ). Make sure that you do this to prevent jobs being run on your system forever!
Viewing the Validation Report
In the previous section, we created an Orbit Monitor to run our validate.py file, which included a line of code that executed the validate() method of our Data Contract.
We also scheduled the Monitor to run at a defined schedule and saw that Monitor Jobs were launched and completed. Now let's view the resulting Validation Reports in the GUI.
-
In the same project on the GUI, click on the
Data Healthtab ( ) in the navigation bar on the left.
 -
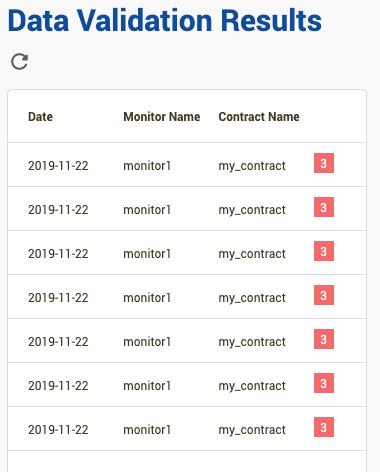
Under
Data Validation Resultsyou should be able to see a list of your Validation Reports. The number of rows may vary according to how many scheduled jobs have run by this point.
-
Each row represents a validation report. Click on one to display details of the Validation Report.
-
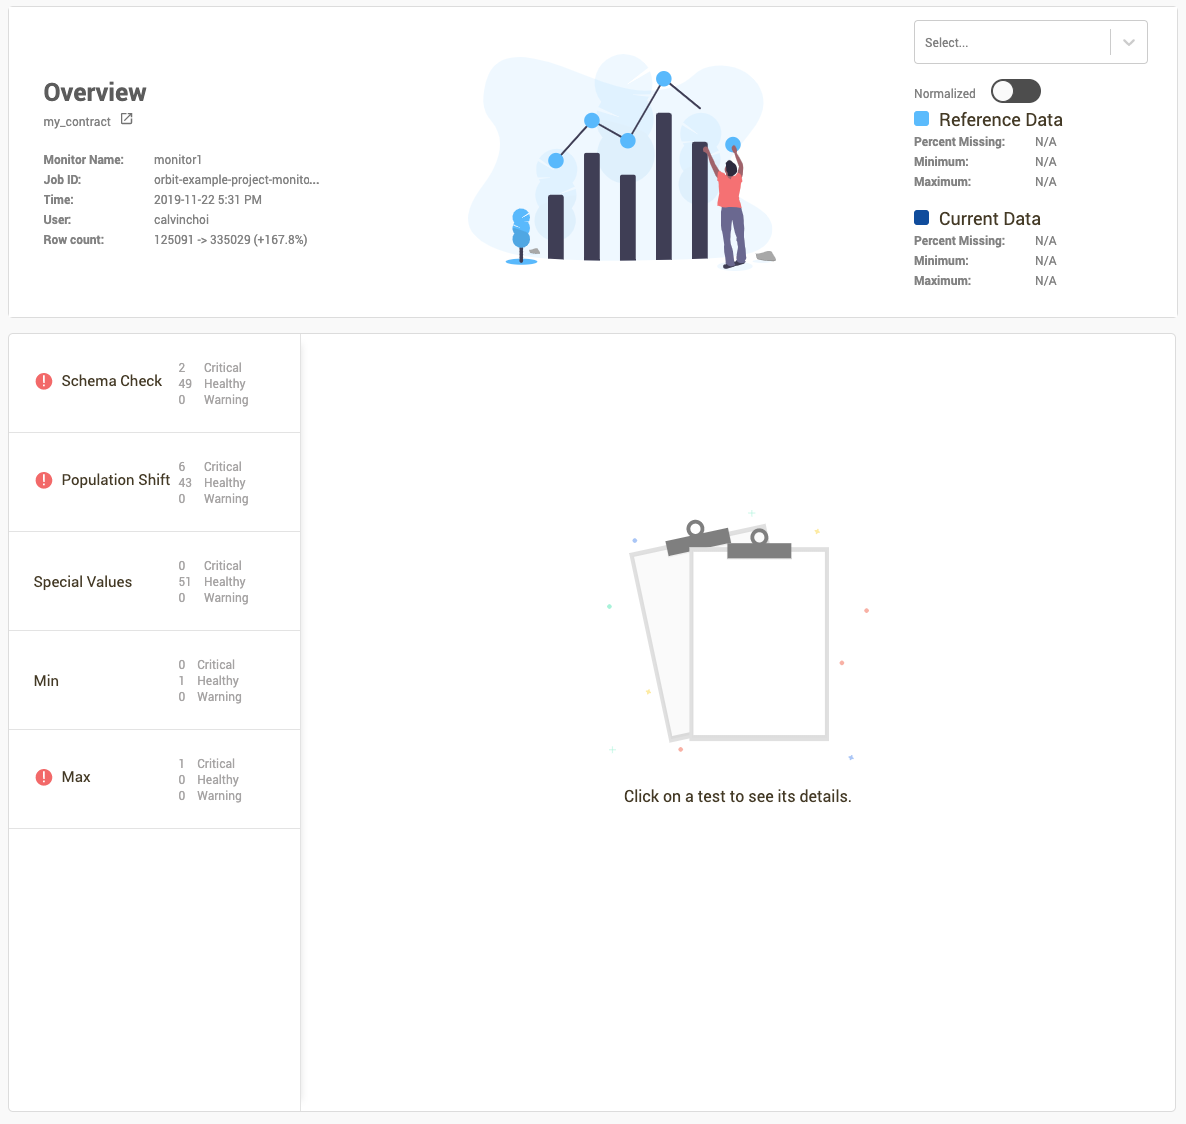
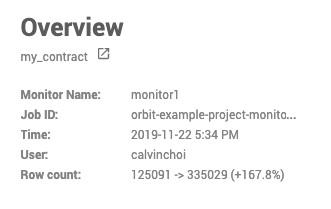
In the Overview section, you can see the following information about the Validation Report:
- The name of the Data Contract that was validated
- The Job ID of the Monitor Job that produced this Validation Report
- The name of the Monitor that spun up the Validation Report's Monitor Job
- The number of rows in the reference dataframe and the new dataframe being validated
-
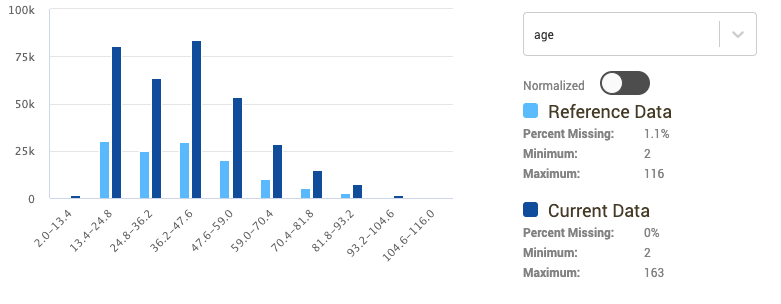
You can use the Distribution Viewer on the top right to visualize and compare the distribution of any columns in the reference and new datasets. Select a column from the dropdown to try it out.
-
In the bottom half of the page, we can see the different tests that were applied to validate the dataset and their outcome.
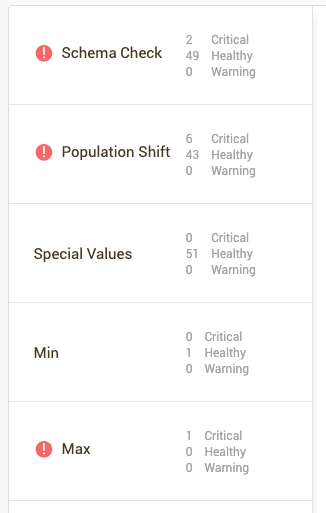
-
An exclamation mark (
 ) indicates a failed test.
 -
Clicking through each of the tests will provide details on the columns in which the test was run on. For example, in the "Population Shift" test, there are several columns with significant population shift between reference and new dataset.

Details on additional tests for the Data Contract can be found in the SDK Reference.
Next, let's take a look at how to use Orbit to track metrics associated with model performance.
Note
In this example, our validation script validates the same dataset every time. In a production scenario, the validation script executed by the Monitor should contain logic to read in new data for every execution. This can be done by using the offsets from the current system date within the validation script or passing in command line arguments to the Python script as part of the Monitor creation command.